What is the problem?
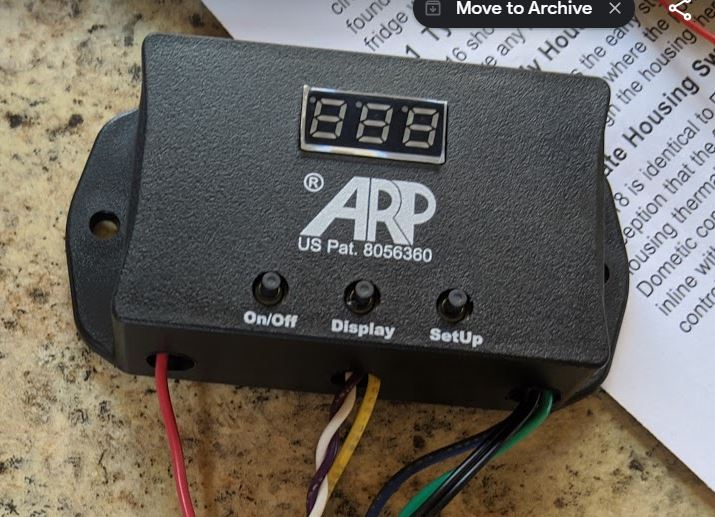
Have you ever heard of the ARP Fridge Defend? Neither had I until recently. I found their website to be pretty darn confusing, but at the end of the day the ARP is a relatively simple device that provides protection for your absorption refrigerator as well as being a cooling fan controller.
NOTE: No affiliation or endorsement here. I am not compensated in any way by ARP. I bought the unit full retail and have no dealing with ARP other than that transaction.
Campers and RVs have two primary types of refrigerators. Absorption or Compressor based. While Compressor based units are gaining in popularity, the majority of what you see out there today are Absorption and absorption will be what we talk about in this article. To operate, an absorption fridge heats an ammonia/water mixture and takes advantage of the evaporation and condensation properties of these liquids along with Hydrogen gas through a complex system of tubes, tanks and boilers. There are no moving parts in the system, unless you want to count the liquids moving around inside these tubes. Calibrated heat drives the reaction and comes from either a propane burner or an electric heating element. Most units support 120V electric and propane, but some even have a 12V electric heating element thrown in for good measure.
This video courtesy of ARPrv is the simplest explanation I’ve found on how absorption refrigeration works. It includes a bit of a sales pitch, but the mechanics are the jist of the system.
It’s clear from the video that gravity plays a key role in proper operation of these units. And by looking at my fridge it was also clear that there was not a lot of slope on many of the tubes., explaining why the fridge needs to be level to operate properly. These fluids and their current state is also why extreme cold can impact the flow of the fluids. I believe the “weak” solution would be the most susceptible to freezing or slushing up and impacting the function of the fridge.
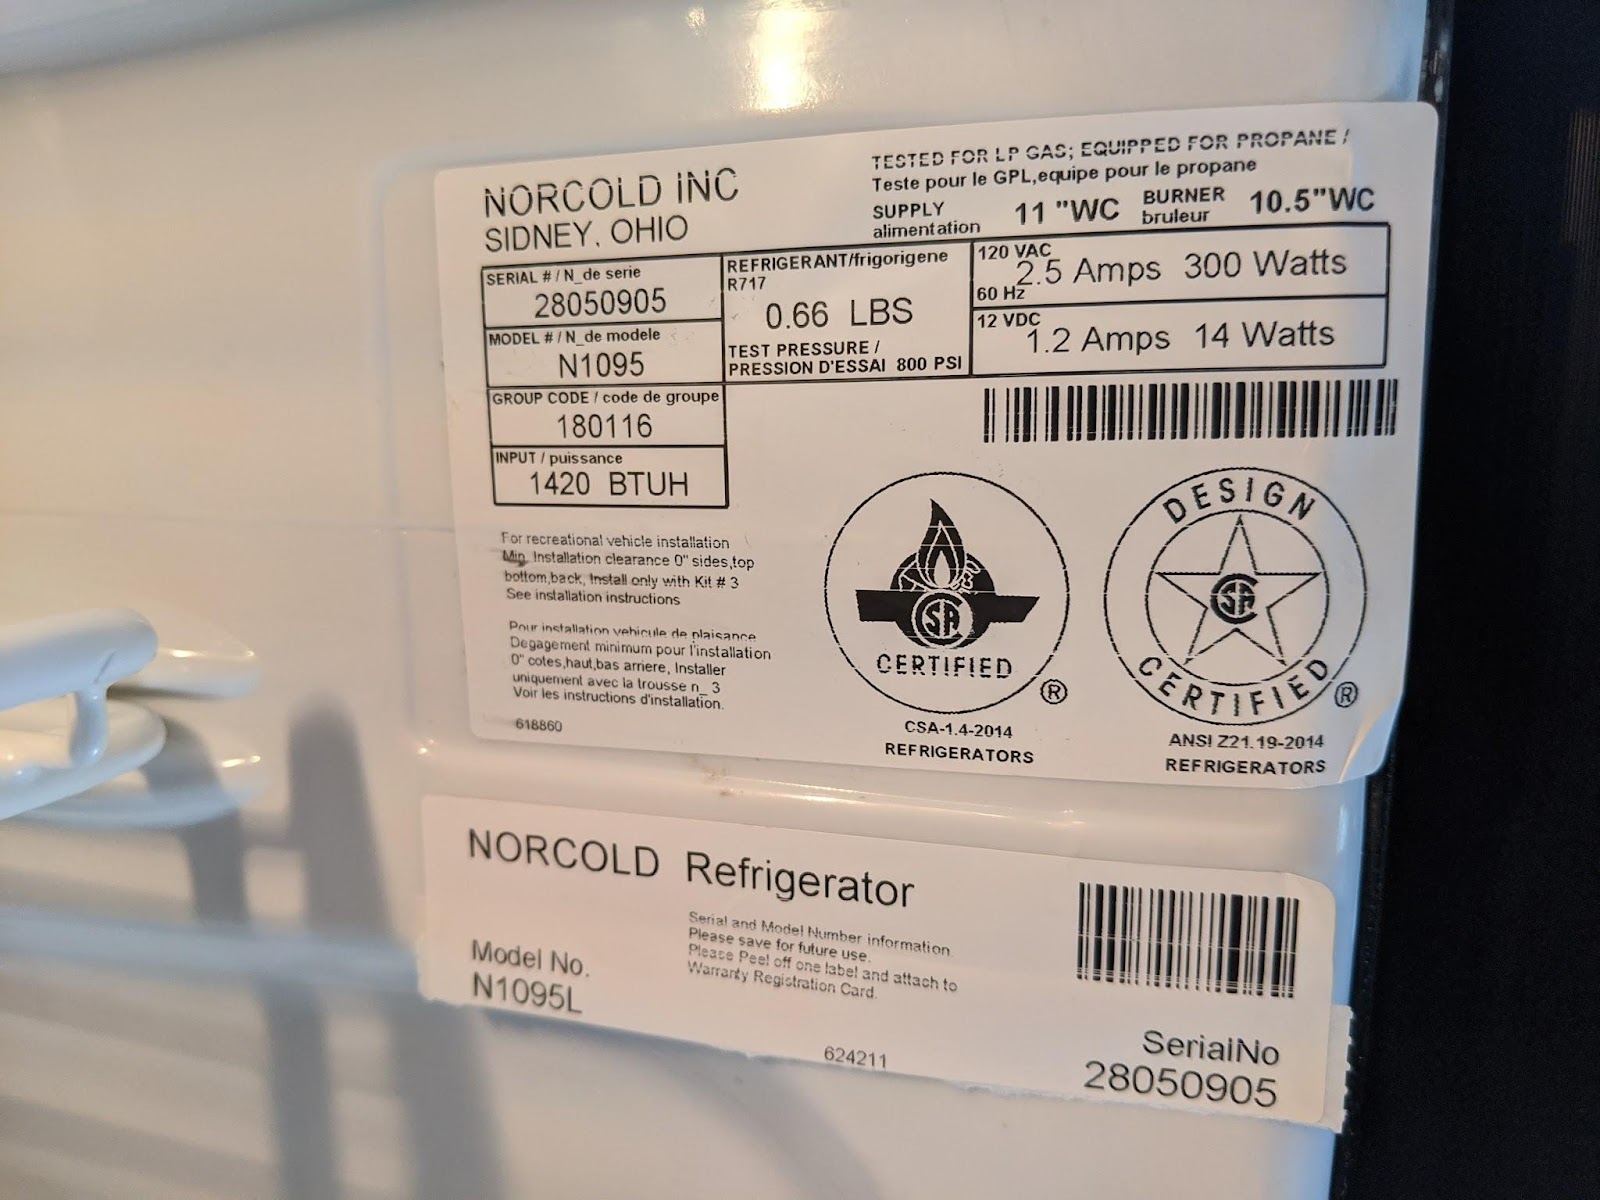
My camper has a Norcold model N1095 and on page 4 of the manual has this:

That statement in the manual confirms the potential danger. I’ll be honest here, the ARPrv website was almost enough for me to give up on this project. All the information you need is there, it’s just separating the wheat from the chaff can be challenging. Anyway, after chatting with several folks who had worked with ARP and installed the units I decided to go for it.
How does ARP solve for this?
Here is where it does get pretty simple. The power wire that feeds the fridge control board is routed through the ARP. This gives the ARP the ability to cut the power, thus turning off the fridge. It also has a sensor you mount right above the boiler to watch temperature. If the boiler gets too hot, the ARP shuts off the 12V power to the fridge, preventing it from overheating. When the boiler cools, ARP turns the power back on and your fridge starts running again. If the ARP is installed and working, the fridge cooling system can’t overheat, it watches the temp at the source.

Installation
Planning
I wanted to accomplish a couple of key things with the ARPrv:
- Control inside the camper. The manual says this is not recommended unless you’re a gadget person. Take that for what it’s worth.
- Replace the D-cell battery powered fan I was using inside the fridge for better air circulation.
- Easy and accessible wiring for troubleshooting should an issue arise.
- Additional fan in the outside compartment to help with cooling airflow (optional)
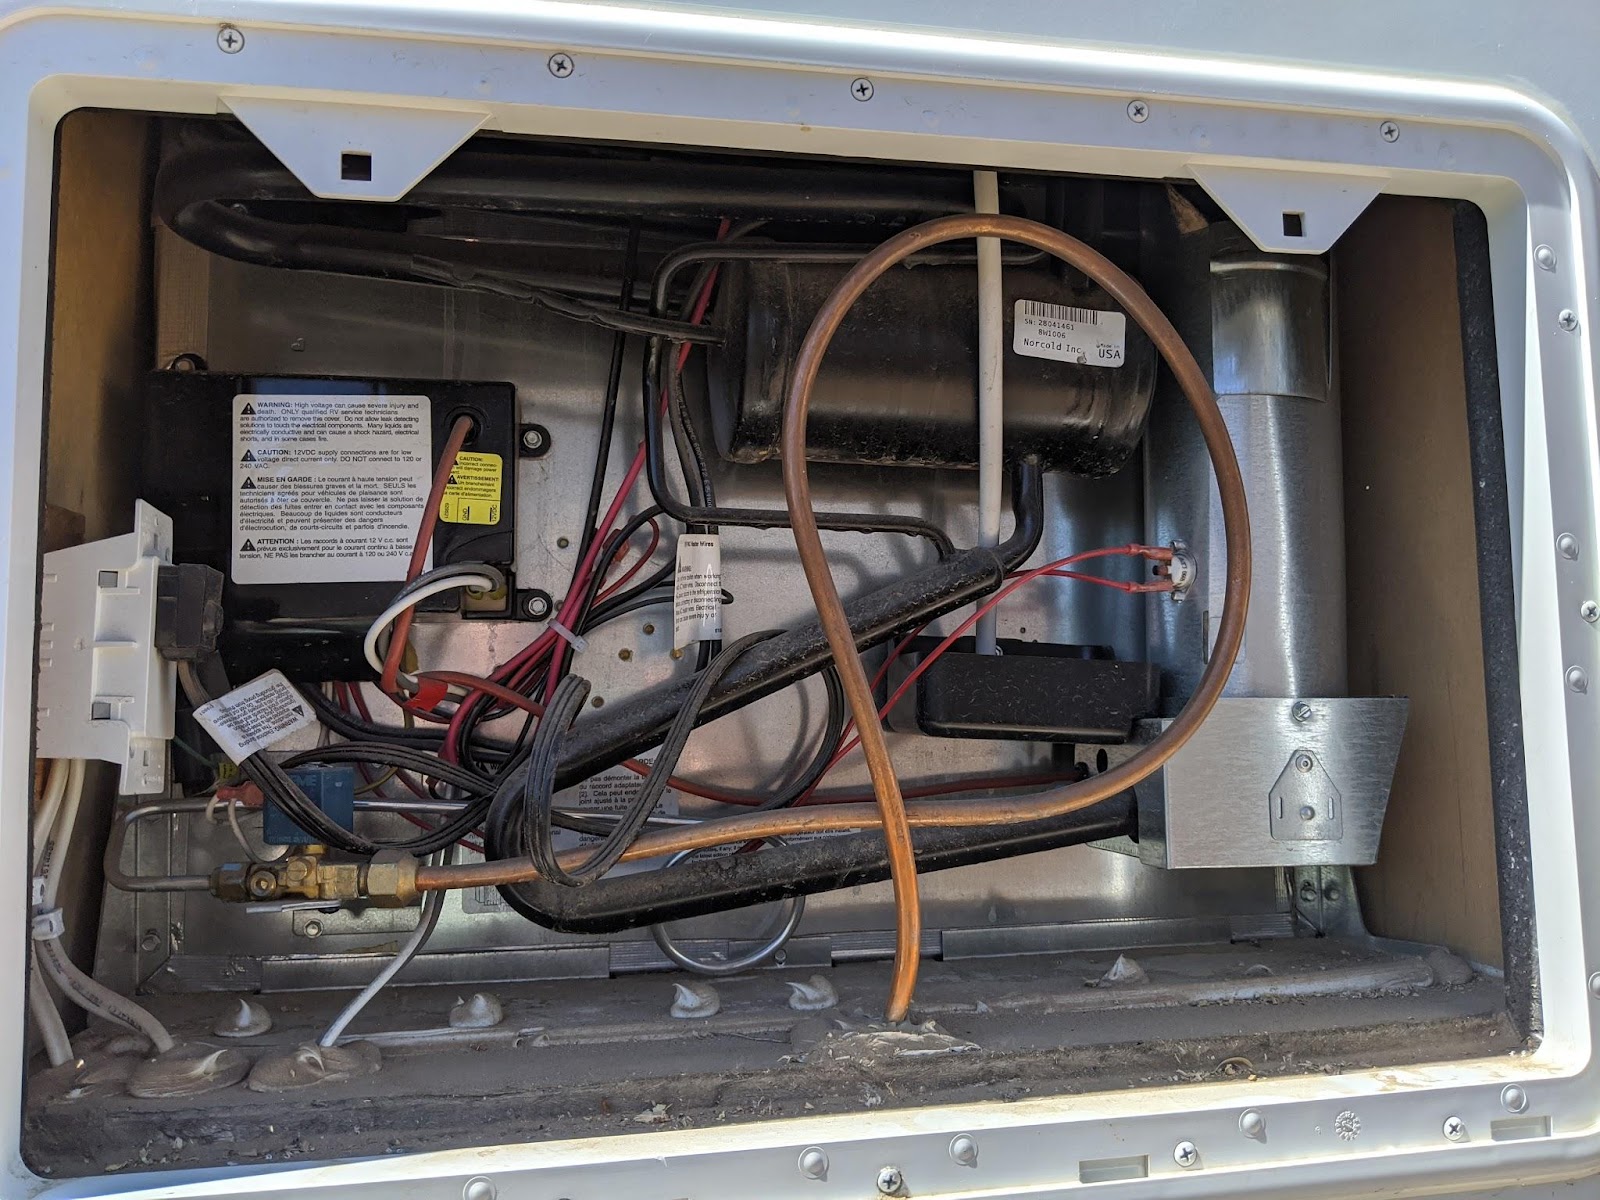
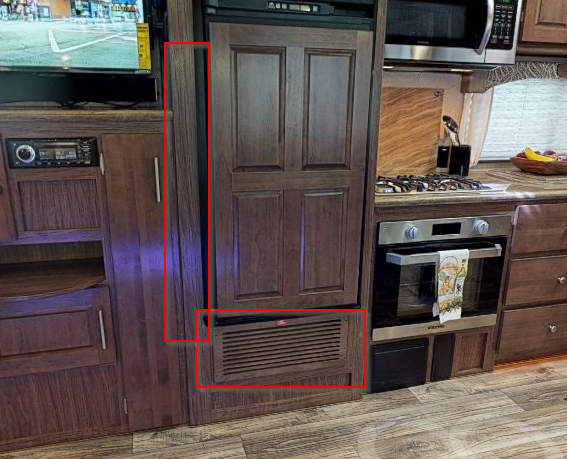
Here is the outside compartment of my fridge before the install and the tag on my fridge as to make/model/etc
The hardest part was extending the cabling on the ARP controller. I wanted to move it inside the camper where I could “keep an eye on it”. The ARP manual recommends putting it in the outside compartment of the fridge “unless you like gadgets”. I wanted the display inside as I’m not gonna be opening that compartment to check it and, at the end of the day, I am a gadget kinda person .
But, if you want an easier install experience just put the ARP control in the outside fridge compartment.
Main Unit Wiring
The wires on the unit itself are 18 gauge and at the hardware store I found an 18 gauge 7 conductor solid core wire that fit the bill almost perfectly. I would have preferred a stranded core, but you gotta use what ya can get. So in this pic you can see how I soldered the wires from the ARP to the “extension” wire from the hardware store (forgive my crappy solder ). In addition to the heat shrink you can see there, I have a large one that went over the whole bundle, wrapping the whole mess up tight. The ARP is on the left and the extension wire is on the right.
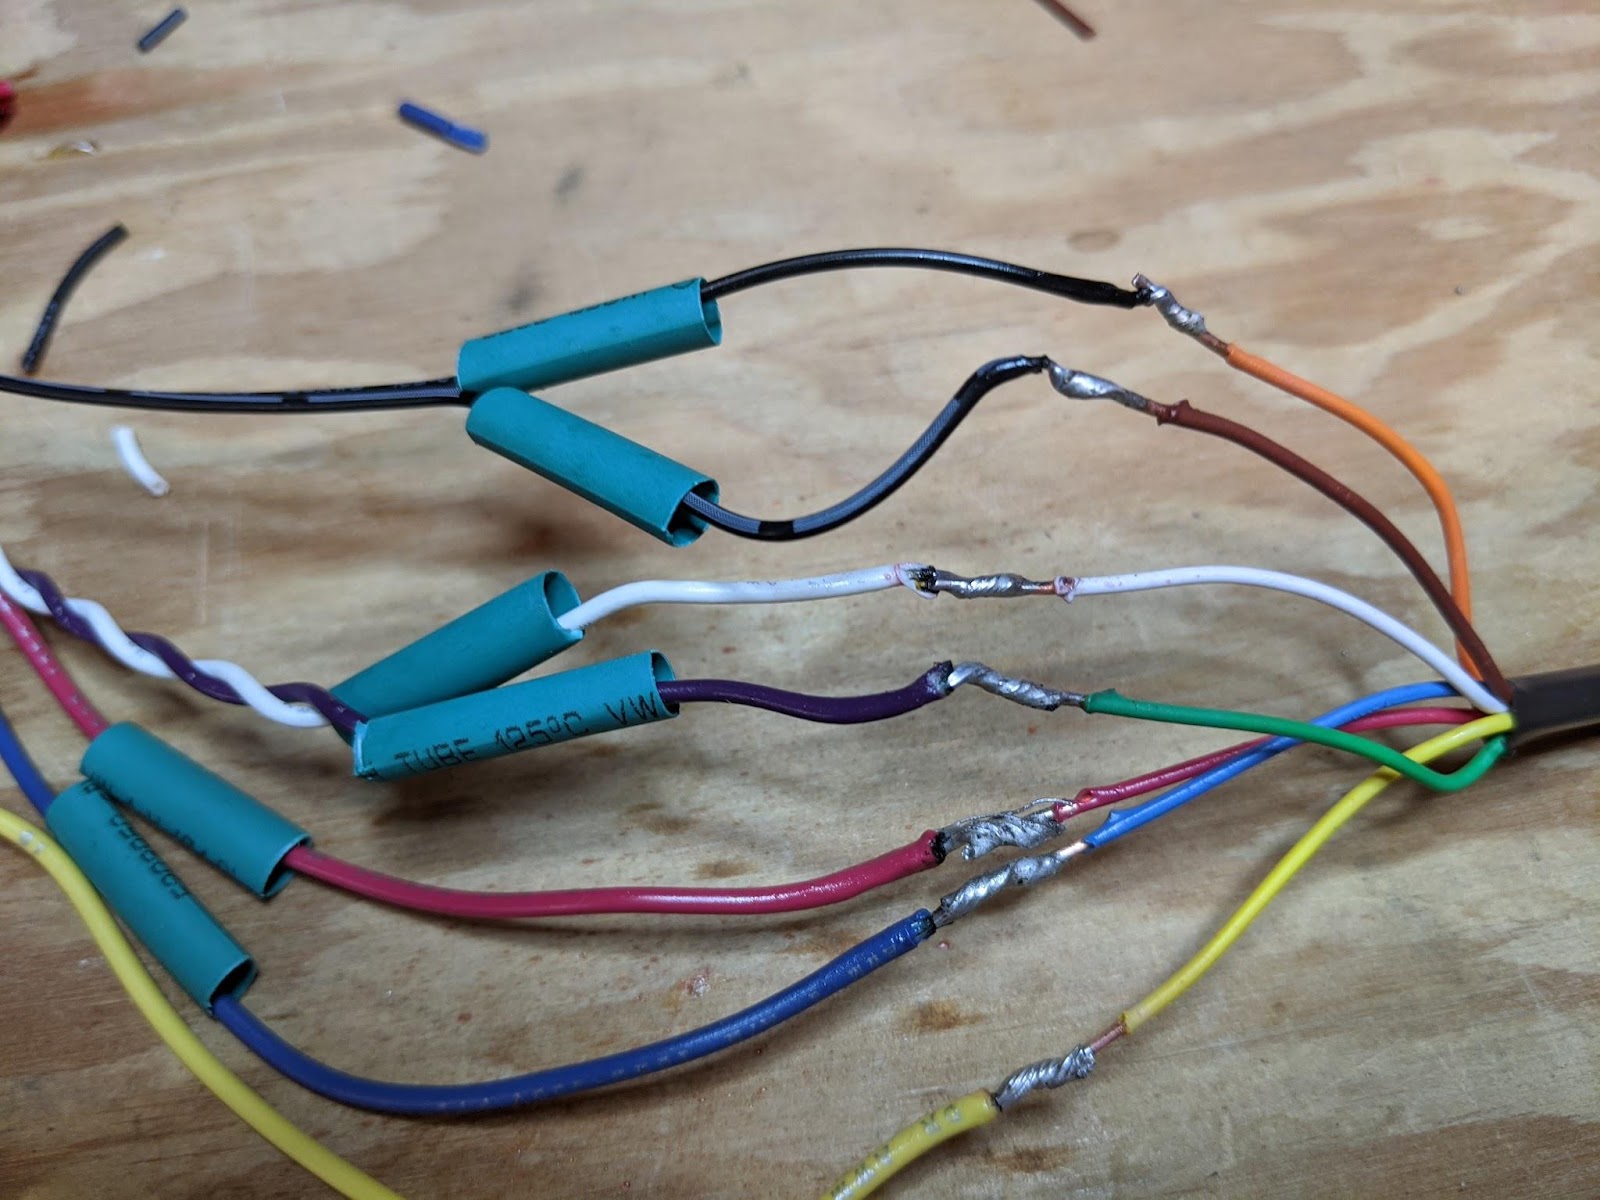
Yes – there are 8 wires coming out of the ARP. Hooked the ARP ground to the ground available right above my mounting location in the 12V power hook up panel. There are way less than 1A of fans on the ARP and an extra AMP here should not hurt anything.

From that DC power panel I run an 150W inverter for the TV, an 18650 battery charger, the Tire Minder repeater thinggy and now the ARP. Probably can’t add much more in here on the existing factory cabling.
I should have taken pictures of pulling the cable, but it was pretty easy if you have “fish sticks”. I got mine at Harbor Freight and they make pulling wire much easier. https://www.harborfreight.com/3-16-i…kit-65326.html
That bottom grill is the furnace return opening. When you open up space you can get to a “gap” between the fridge compartment and the “wall” next to the TV. There is insulation in there, but the sticks were able to get past it and get the wire up there pretty easily. (not my trailer, stolen from Northwood)


 . It is “kinda” blind install and getting all the housing back together takes a bit of tomfoolery but end of the day, not difficult or time consuming (or painful).

At this point the core function of fridge protection is up and running. Onward….
Fan Installation
I elected to install 2 fans in the interior fridge compartment and just one in the outside compartment. The fans are good quality and I really like the interior ones as they are nice and small, yet move a good amount of air.
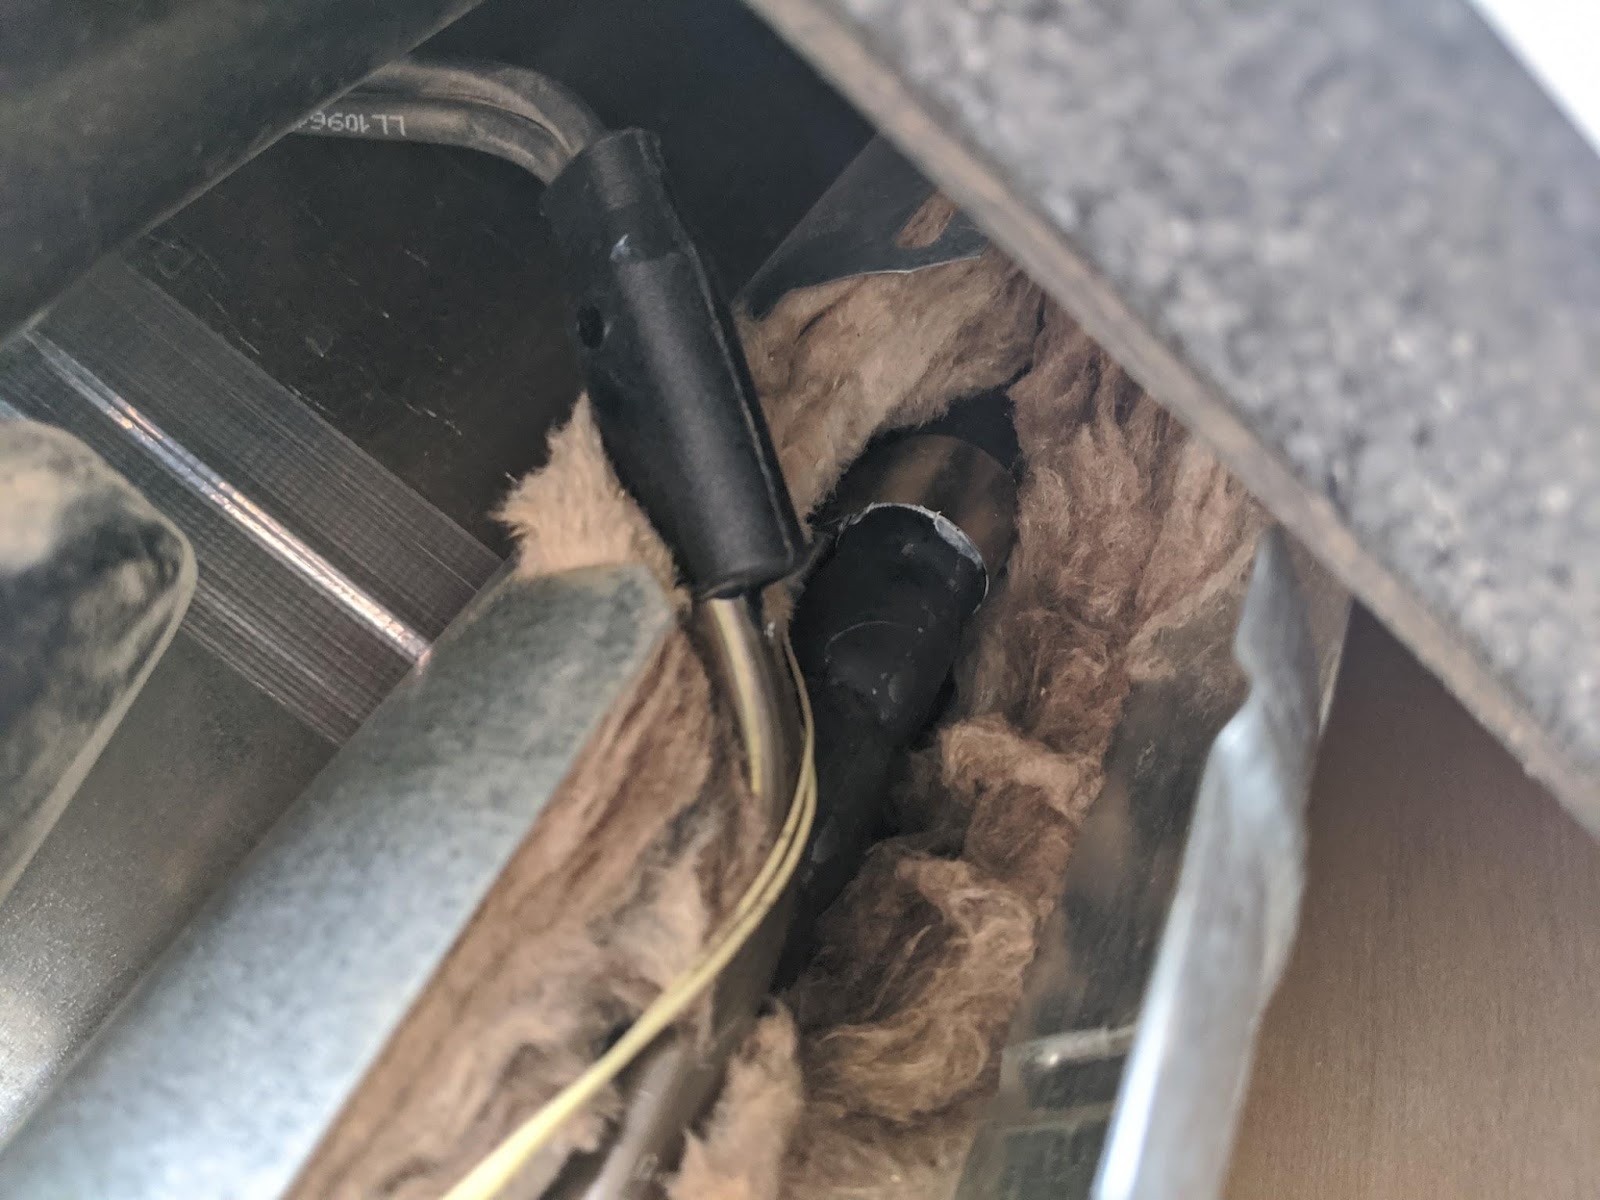
The ARP uses an additional sensor to control when the fans will run. This sensor is mounted near the bottom of the fluid return path as it works it way back into the reservoir. The temperature that triggers the fans to run is adjustable.


I ran the wires that power the interior fan through the condensation drain hose down into the rear outside compartment and over to the terminal blocks. Notice the orange and white wire on the left? I used CAT-5 solid core wire due to it’s small size and relative stiffness to make it easier to push it through the small drain hose. As you can see here there is a drip tray below the fins to catch the condensation. And a small drain hose that takes the condensation down to the outside compartment where there is a small cup near the boiler that holds the water until it evaporates.


- Wires to boiler sensor.
- Condensation drain hose. Note the black cup at the bottom and if you look close you can see the orange/white wires coming out of the left side.
- The boiler is behind this tin enclosure.
- The exterior fan simply bolted to the bottom of the compartment.
- Extension wire dropping into the hole that goes to the furnace compartment inside.
- The power input to the Norcold control board is the yellow wire here.
- Fan control temperature sensor.
- Terminal blocks with wiring terminations.
Summary
Not hard, but did take a bit longer than I expected. Minimal trips to the hardware store were required. which is unusual for me!
I feel the product is good and does as advertised. I do think that ARPrv could make the install easier by including a bit more kit that would be used by the vast majority of folks installing this thing. Mainly around longer wires and more connectors/crimps/etc. But in the end if you’re somewhat handy around electronics you probably have the needed bits around the house.
To this point, instead of wires coming out of the box, it would be nice to have terminal lugs. Then you wouldn’t need splices or have the temptation to open up the ARP and solder (I did NOT open my ARP, but the thought crossed my mind!)
I’d also like to see a more modern interface – preferably a bluetooth interface to an app so I can see what the heck is going on over time. I love data and knowing how things are performing….and figuring that out with this unit is doable but not easy.
Conclusion and Function
Installed in in July 2020 and used the unit quite a bit since then. We are happy with it. Hot weather camping and the fans kick on as they should. For the protection side…..
We were coming home from a trip on I25 heading south from Santa Fe. The wind was bad….like real bad. Saw a utility trailer flipped on the side of the freeway bad. It kept getting worse and we kept going slower and slower. We were down to probably 30MPH and decided to take the next exit and see if we could wait it out. Just stopped right there on the offramp shoulder…..and not very level.
Wife and I managed to go back into the camper without the wind ripping the door off the truck or the camper…we wanted some lunch! Sitting back there, just rocking away in the wind, unlevel, on the side of the road. The wind was loud but I did hear a distinct click sound from the fridge….opened it up and there was no power. Sure enough ARP displayed a countdown timer that it uses to determine when to attempt restart of the fridge. And I didn’t have to go out in that wind to see it!
I don’t know if it has turned on protection other times, I honestly don’t pay that much attention to it. But if it has, it hasn’t been excessive and our fridge has stayed nice and chilly!
I hope this writeup has been useful, and if it has pop on over to the Member Community and let us know! Heck, tell us about your experiences with absorption fridges or the ARPrv. You can even tell us how terrible we did, at least then we can learn and try to do better next time.
-Kyle
Update 2/2021
Ever heard of a cold weather kit for a RV fridge? Yeah, I knew they were out there but hadn’t installed one.
The reason for the kit is that in freezing weather, it is possible for the weak solution in the unit to freeze, gumming up the flow of fluids and causing the fridge to over heat…..a potentially dangerous situation.
During our recent cold weather camping I spent most of a day sitting in the camper reading as the wind blew at 30-40MPH and the temps didn’t get over 19F. Yeah, it was nasty out there.
During that time, twice I noticed the ARP Fridge Defend click and shut down the fridge. It came back up and worked for several hours before shutting things down again. IMHO – good protection!