The Honda EU family of generators is considered by many to be the gold standard in quiet and reliable portable power. Honda first made the EU2000i in 1999 and it was groundbreaking. Small, portable, fuel sipping and very quiet – it was perfect for camping and gained a HUGE following and fan base. Other brands came along over the years, including some excellent models from Yamaha. Recently the market has been flooded with numerous imported inverter generators, and many people have great success with them. However I don’t believe any of them are as quiet or reliable as a Honda.
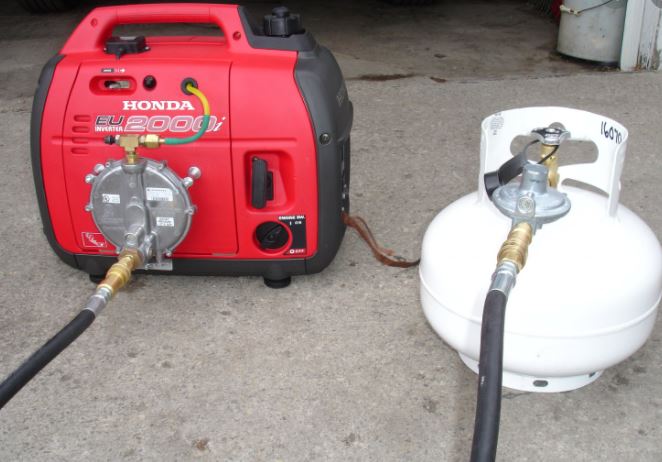
The downside of the Honda is the lack of a Dual-Fuel model. Here we are going to talk about doing a conversion to a Honda EU2000i Early model to run on Propane using the Grenergy Conversion Kit.
Backstory
When we bought our first trailer in Sept 2007 we also purchased a lightly used Honda EU2000i from the couple. A few months ago I started looking into converting it to run off of propane. I liked the kits from Genconnex and Hutch Mountain. however quickly learned that neither of those companies supported my generator.
In the EU2000i model, Honda had 2 versions. Those with serial number BELOW EAAJ-2017305 could be considered Version 1 and all the rest Version 2. They also have the newer EU2200i as the current version. Because my serial # is EAAJ-1240xxx I am version 1 and neither of those kits would work on my unit. DAMN. That is when I started looking at the Champion 2500 Dual-Fuel.
I knew the Champion would be louder than my Honda just based on the advertised dBA, Then a close friend of mine got the same unit. It works great, however I was surprised at just how much louder it really is. A few dBA really means something.
The Solution?
My friend getting the Champion triggered me to go looking again for a better option. I stumbled across Grenergy, who seems to be a new player in this field. I spent a fair amount of time reviewing the information and video’s on their website as well as digging up a handful of online reviews.
The Issues
Grenergy’s claim is that after a large amount of time and research they came to understand the problems and issues that people encounter with their competitors conversion kits.
First off is the manifold that delivers the propane to the carburetor were made in a way that didn’t deliver a very effective venturi effect which is required to provide enough vacuum to the regulator so the regulator can properly adjust the propane flow to the engines demand for fuel.
Second is a type of vacuum “interference” from the tightly closed up case on the Honda. This air cooled engine uses fans in the case to move air over the engine for cooling, creating a vacuum effect inside of the case – in the same space where the intake and air filter live. The theory is that this effect impacts the ability to give a solid vacuum feedback via the venturi effect back to the regulator.
The Solutions
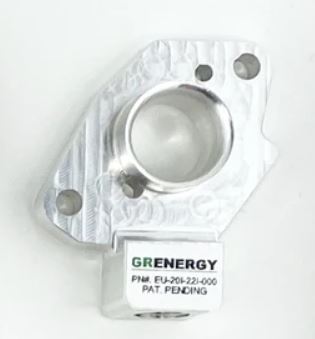
The first problem they solved with a custom designed and CNC machined Fuel Plate Adaptor which they designed to improve the venturi effect as well as allow for smooth airflow through the adaptor and into the carburetor.
They solved the second problem by installing a couple of simple round vents into the case of the generator which relieve the vacuum effect.
These problems combined along with the greater sensitivity of the Version 1 Honda’s are why other conversion kits don’t work on Version 1 Honda’s. Grenergy claims their fixes solve both.
Sold…..
After reviewing the above and checking multiple online reviews I decided to go for it. I did not need to contact the company for support, however others on the interwebs did and got very supportive service.
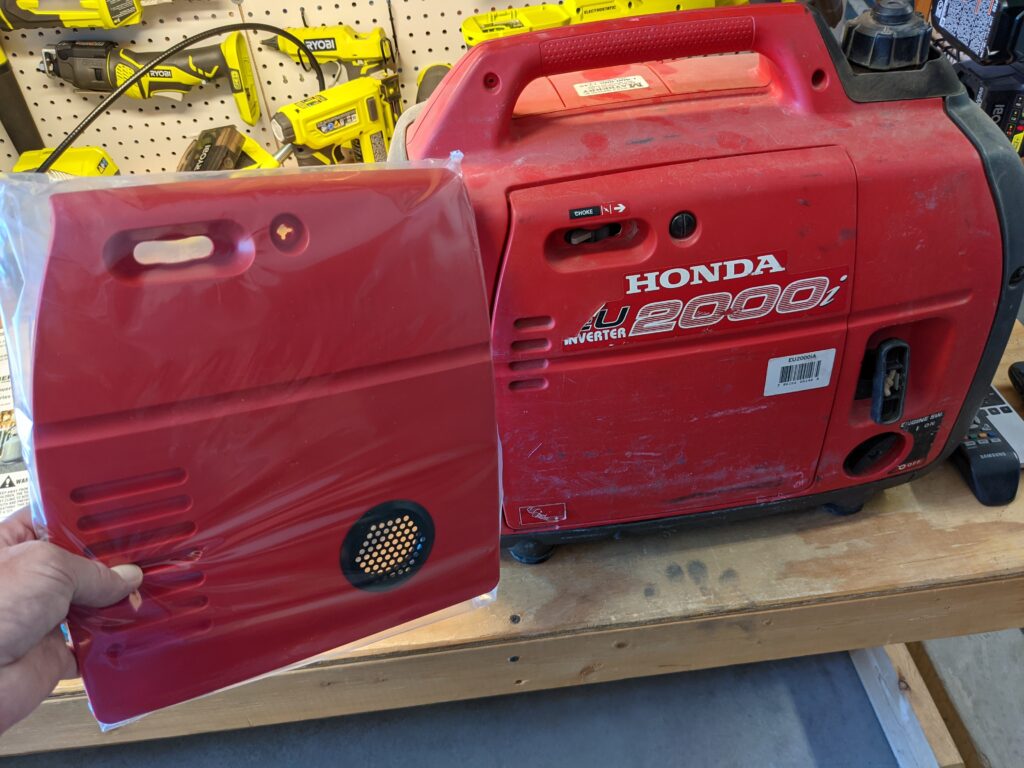
In addition to the base kit, I elected to purchase the EU2200i style cover with a pre-installed vent and then installed the 2nd vent into the spark plug cover. Everything else needed was included.
The Kit
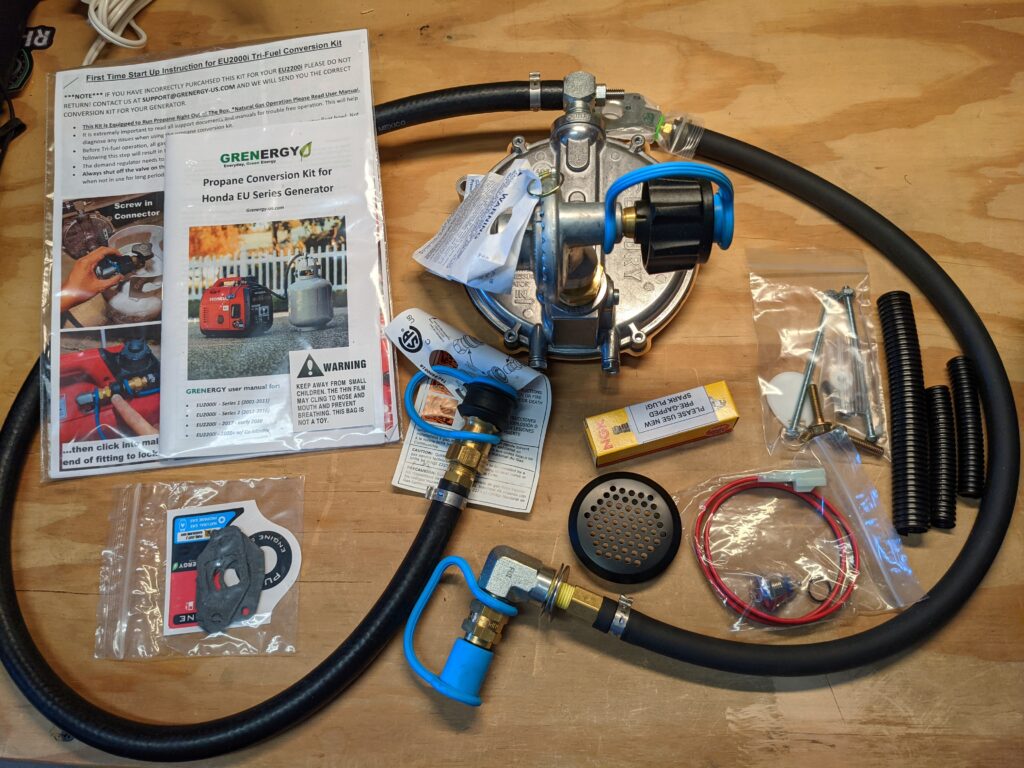
You can tell these guys put a lot of thought into each and every component that is included and making sure you will have everything you need for a successful installation.
Everything here is quality and has attention to the details. A couple of examples of where they go above expectations:
- Having you replace the intake bolts simply because there is a known issue with the factory bolts working themselves out.
- A new spark plug – if ya need it or not!
- The rubber caps are all high quality, thick and flexible rubber.
- Clean and professional stickers for both the new “shut off” button and the fuel selector.
- Wires for the switch are pre-stripped to the needed length.
- All the gaskets you likely won’t need.
The Install
The installation is not difficult, but be sure you pay attention to the details. I strongly recommend you read the manual, in particular going through the preparation steps such as checking and cleaning the spark arrestor. In particular if your generator has some hours on it.
Read the manual – there is good information in there that can help you avoid some potential pitfalls of the install.
The actual installation instructions are well illustrated – take your time and make sure you understand what they are telling you to do. I often had to do a double take on the pictures in the manual vs my actual generator and make sure I was on the right track.
Watch the video – in it he clearly shows you the parts of the install where people tend to run into issues.
I’m not going to go through it step by step, the kits instructions do that very well.
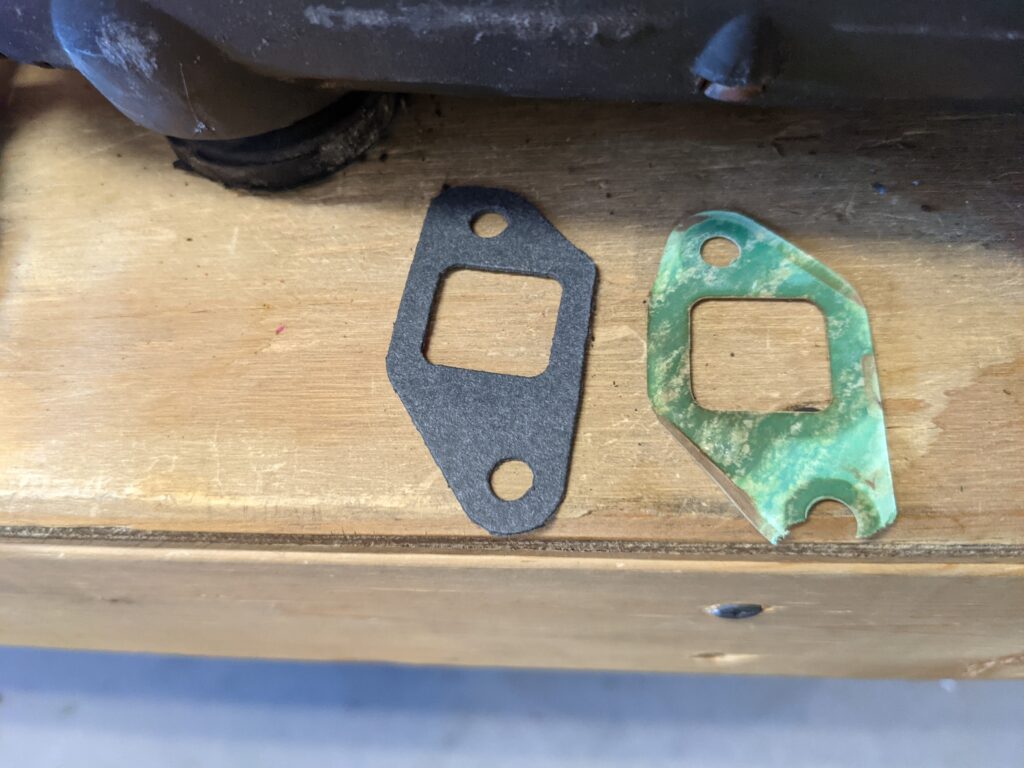
I had one gasket that was oil soaked and failed. Replacement was included. The rest of mine were good to go.
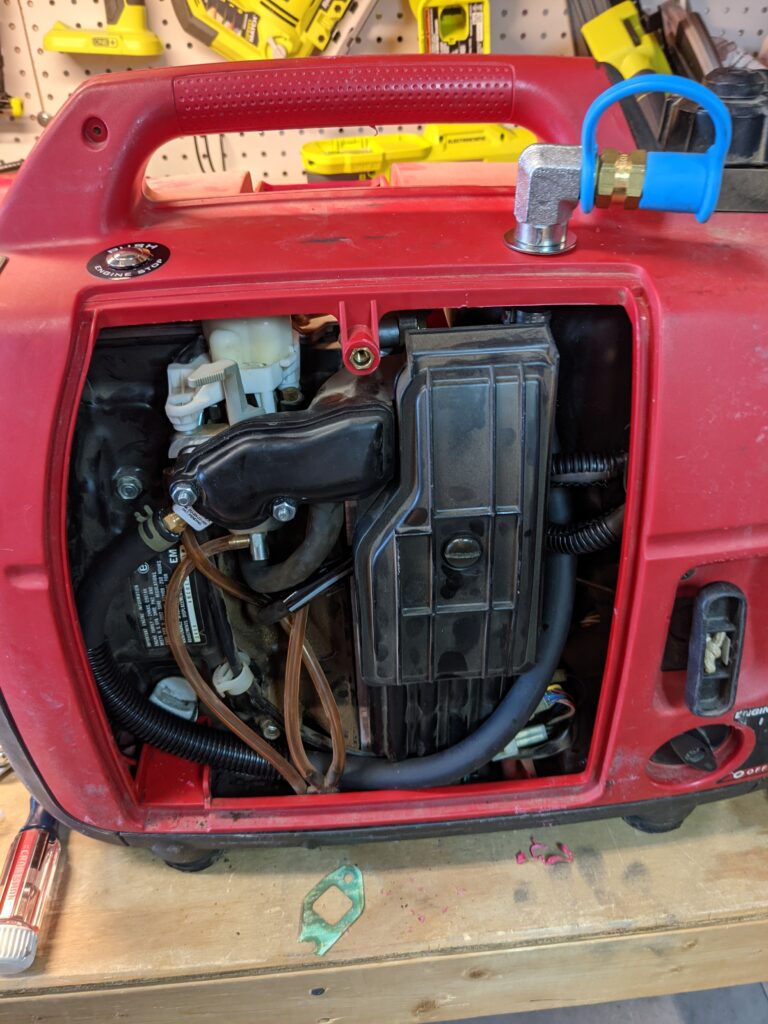
Install is done – just need to put the sticker on the fuel selection switch
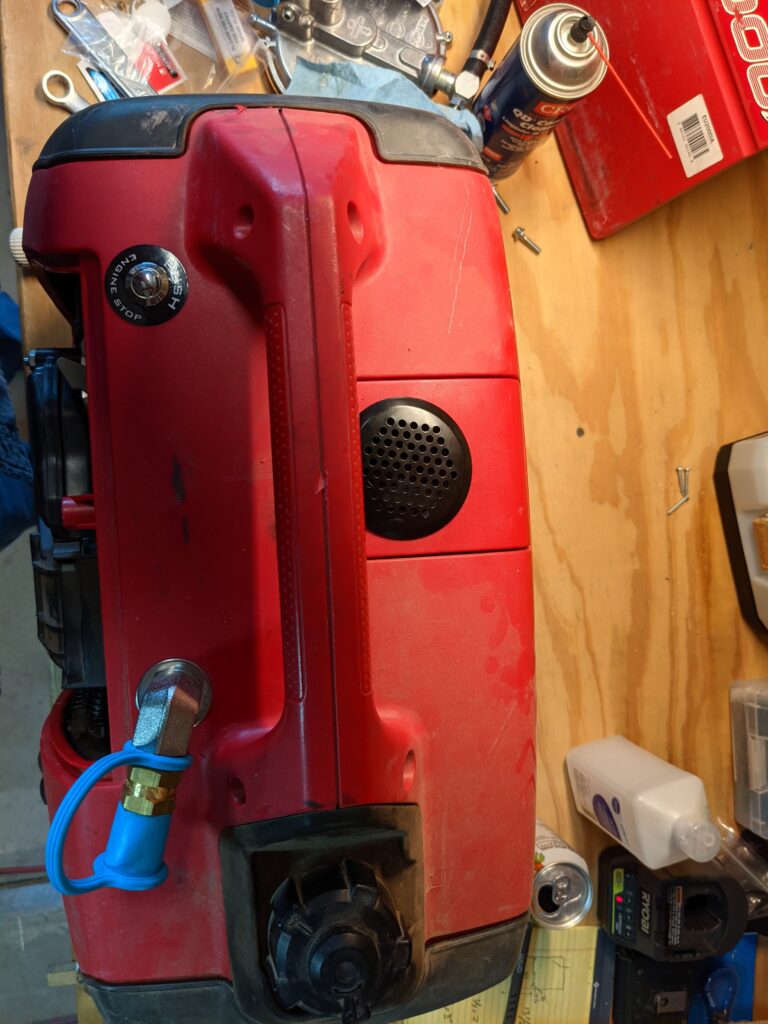
View from the top
The Results
It started on the 3rd pull of the rope! My EU2000i had been sitting in the shed for at least 6 months with all the fuel run out of it. When firing her back up, it generally take 8-10 pulls on gasoline. I attribute that to having to get the fuel pumped into the carb and filling the bowl. 3 pulls on propane really surprised me.
The Grenergy manual states that I most likely will need to make adjustments to the regulator and gives detailed instructions on how to do so. Not only am I at 5000′ elevation, but this is the early model generator. Both of which “should” need adjustments – however in my case, she just purrs out of the box with no adjustments needed.
You can see that ECO mode works just fine. Actually – way better than I expected. You often hear that you get a lower maximum output when running on propane. As you can see in the video, we are still at 110V with a 1400W load. I did attempt to “stress” it by adding 700W more to the load, When I did that, it kept running, however the voltage dropped down to 103V or so – not good. It is unclear to me why the overload protection did not kick in.
Camper BBQ Quick Connect
Now I want to run the generator off the BBQ quick connect, eliminating the need to haul around propane bottles. My first pass at this failed.

The propane feed from the camper BBQ Quick Connect is already regulated down to low pressure. That meant I had to remove the smaller High Pressure regulator from the much larger demand regulator. I won’t be needing the High Pressure regulator in this setup.
I have several 12 food 5/16″ Inner diameter (ID) propane hose that I use to connect my Camp Chef griddle to the camper. I took the Demand Regulator and that hose along with a few connecting bits I already had down to the local True Value to get the connectors I needed to interconnect. I don’t recall the exact bits, but the end game was a mix of pipe, flare and NPT fittings.
I excitedly hooked it all up, confirmed propane to the Demand regulator, went through the prime procedure and attempted to start it. Attempted again….and again. No love.
That evening I shot an email off to Grenergy support explaining my conundrum. I had a response in minutes. After explaining more about my setup, he advised that 5/16″ hose was not large enough to supply the fuel to the generator and recommended either 3/8″ or even 1/2″ hose. Minutes later Amazon had a 1/2″ hose with quick connect on the way to me.
Another trip to True Value, and I had it all setup. Yep, works great!
Summary
I couldn’t be happier. While I likely could have sold the Honda for $500 and bought the Champion for $600 or so and thus spent less, instead I get to keep ole reliable yet never have to deal with gasoline again.
I don’t think this would have been possible with other kits, heck they wouldn’t even sell their kits to me based on the serial number or engine number of my Honda.
We have proven that the Grenergy product is the real deal and I hope they do well in their business! Those of you that have been following me know that I don’t promote products I don’t use, and rarely get excited about a product, however this one has really come through for me.
What I need to learn now is what all of you do to enable longer and easier off grid camping. So do me a favor and hop on over to the Member Community and let me know.
PS: I’ll update this post when I determine all the pieces parts needed to hook this up to the propane BBQ quick connect on the camper. Also I believe a Soft Start RV for the AC is in my nearish future and I can’t wait to see if this ole girl can run it.
I have no affiliation with Honda nor Grenergy. This write up is based on my experiences after purchasing these products.
UPDATE: Grenergy reached out to me for permission to link to this article.